---
title: "Battle of Midway"
description: "Explore the Battle of Midway, fought from 3 to 6 June 1942. Learn how US code breakers, carrier aviation and decisive leadership destroyed four Japanese carriers and turned the tide of the Pacific War."
url: "https://www.normandy1944.info/home/battles/battle-of-midway"
date: "2026-07-23T11:31:01+00:00"
language: "en-GB"
---
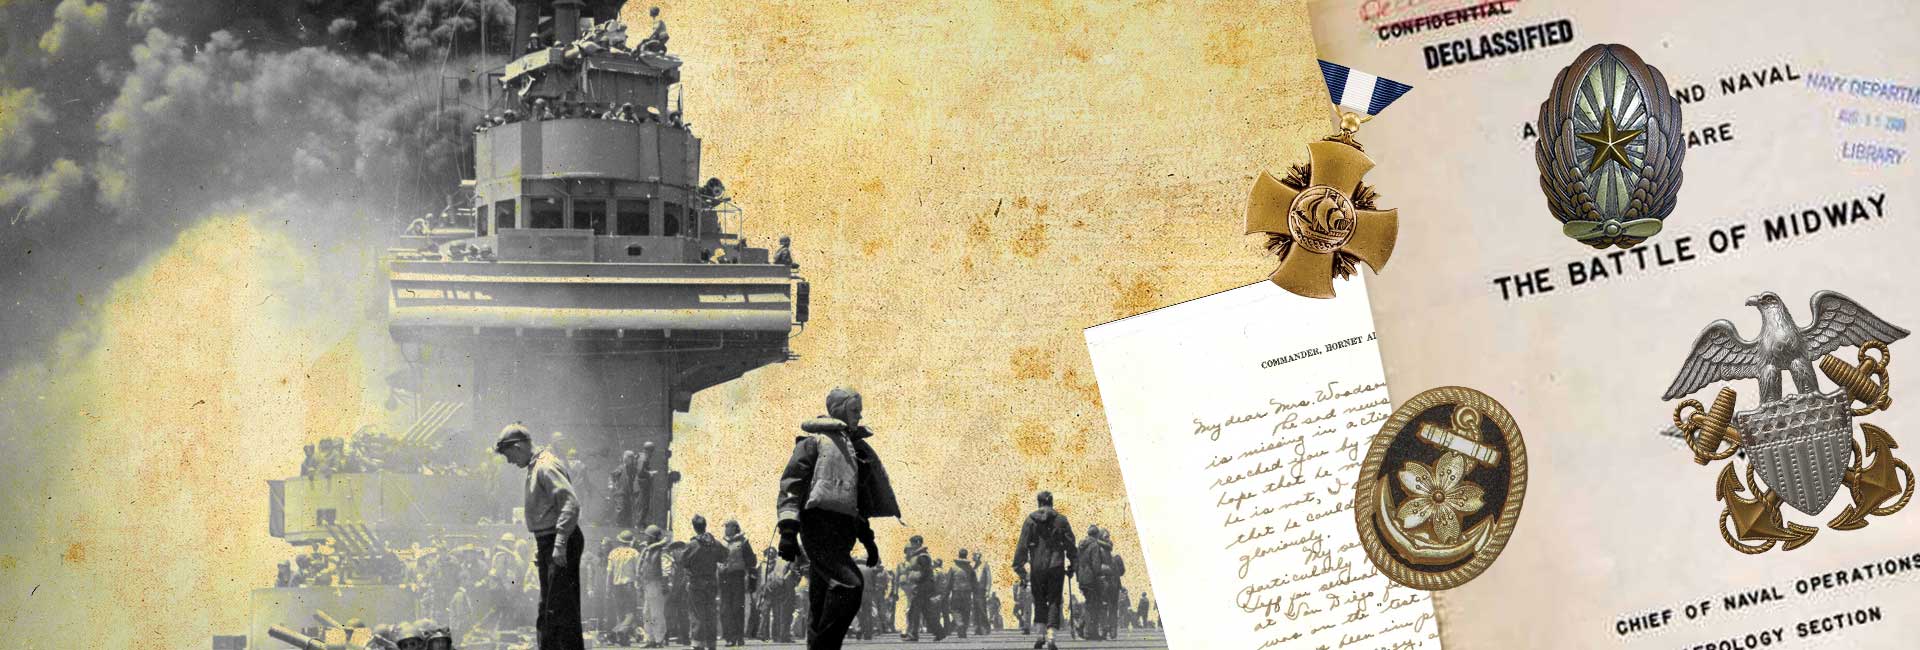
# Battle of Midway
## This battle started on: 3 June 1942
Objective: Destroy the remaining American aircraft carriers and capture Midway Atoll to strengthen Japan's defensive perimeter.
[](#) [](#)
- [Battle of Midway](#)
- [ Intro to the battle ](#intro)
- [ Into detail ](#indepth)
- [ Aftermath ](#aftermath)
- [ Cite this page ](#cite)
## Commanders of the Battle of Midway
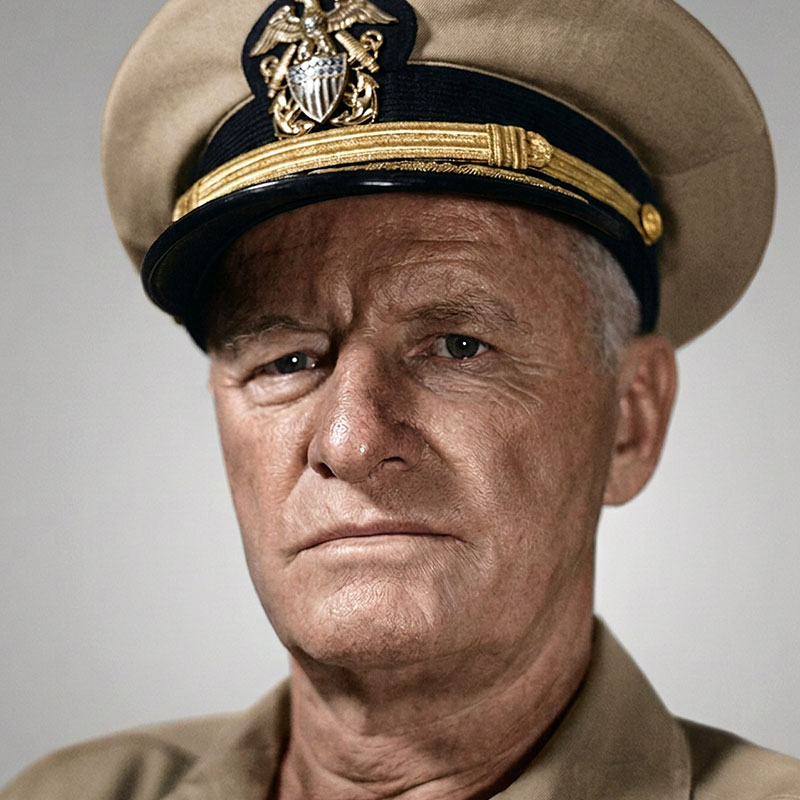
### Chester W. Nimitz
Nationality: American
Commander-in-Chief, Pacific Ocean Areas
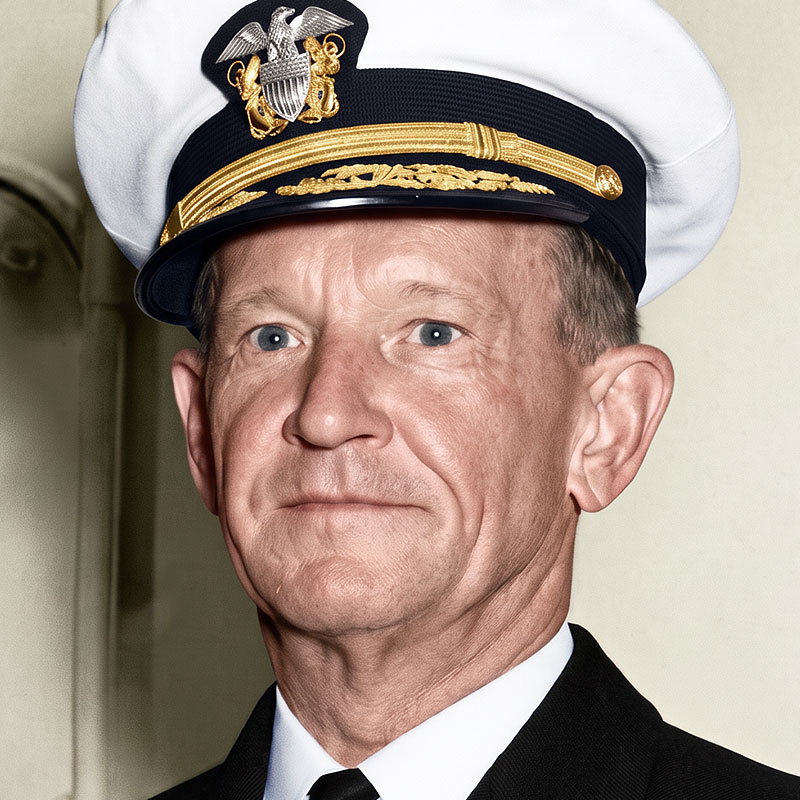
### Frank Jack Fletcher
Nationality: American
Commander, Task Force 17 (Overall tactical commander during the battle)
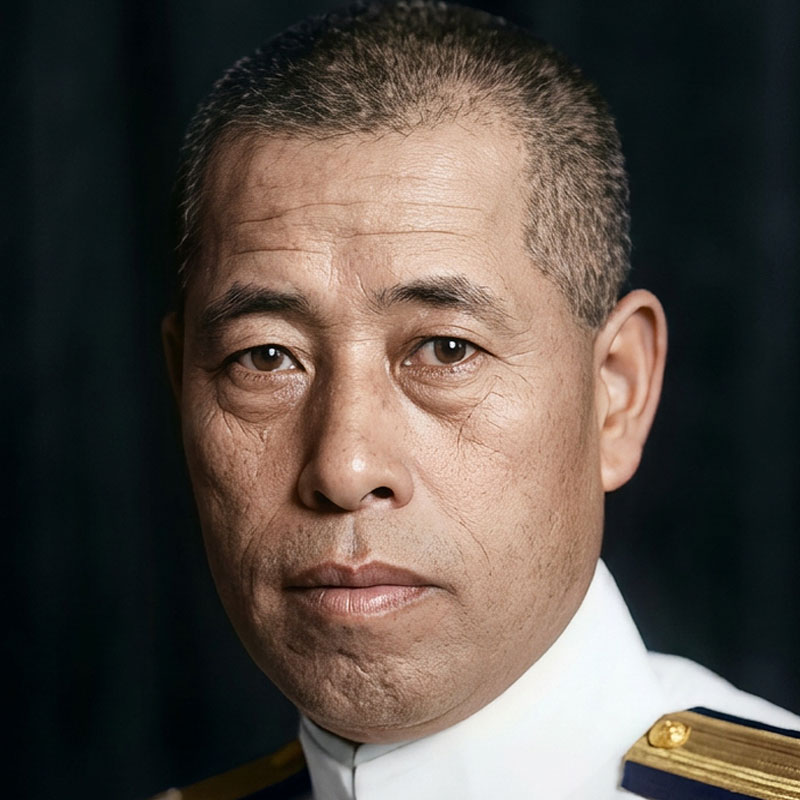
### Isoroku Yamamoto
Nationality: Japanese
Commander-in-Chief, Combined Fleet
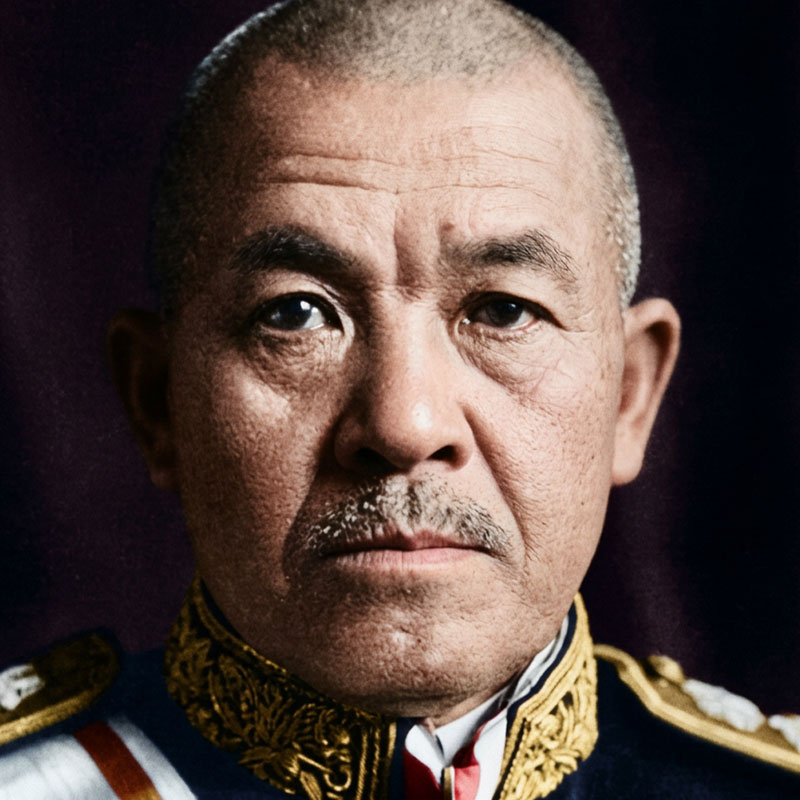
### Chuichi Nagumo
Nationality: Japanese
Commander, First Air Fleet (Carrier Striking Force)
### What was the Battle of Midway?
The **Battle of Midway**, fought between **4 and 7 June 1942**, was one of the most decisive naval battles of the **Second World War**. Taking place around the remote **Midway Atoll** in the central Pacific Ocean, it pitted the **United States Navy** against the **Imperial Japanese Navy** just six months after the Japanese attack on **Pearl Harbor**. Although Japan entered the battle with a numerical advantage and a reputation for naval superiority, the outcome fundamentally changed the course of the Pacific War.
[Admiral **Isoroku Yamamoto**](https://www.normandy1944.info/home/commanders/life-and-death-of-isoroku-yamamoto), Commander-in-Chief of the Combined Fleet, hoped to lure the remaining American aircraft carriers into a decisive battle and destroy them. Unknown to the Japanese, American cryptanalysts had partially broken Japan's naval code and correctly identified **Midway** as the next target. Armed with this crucial intelligence, Admiral **Chester W. Nimitz** positioned his carriers northeast of the atoll, setting a carefully planned ambush.
Within a matter of hours on **4 June 1942**, American dive bombers crippled three of Japan's four frontline fleet carriers. A fourth carrier was destroyed later the same day, while the United States eventually lost the carrier **USS Yorktown**. More significant than the ships themselves was Japan's loss of hundreds of highly trained naval aviators and experienced flight deck personnel, whose expertise proved impossible to replace quickly. The battle ended Japan's ability to seize the strategic initiative and marked the beginning of a sustained Allied offensive across the Pacific.
### Japanese expansion after Pearl Harbor
Following the surprise attack on [**Pearl Harbor**](https://www.normandy1944.info/home/battles/attack-on-pearl-harbor) on **7 December 1941**, Japan launched a rapid series of offensives across the Pacific and Southeast Asia. Within just a few months, Japanese forces captured **Hong Kong**, the **Philippines**, **Malaya**, **Singapore**, the **Dutch East Indies**, **Wake Island** and numerous other strategic locations. These victories secured vital supplies of oil, rubber and raw materials while extending Japan's defensive perimeter thousands of miles across the Pacific.
By the spring of **1942**, the Imperial Japanese Navy appeared almost unstoppable. Its carrier strike force, known as the **Kido Butai**, had played a decisive role in nearly every major operation, demonstrating exceptional coordination between aircraft carriers, naval aviation and surface warships. Allied naval forces had suffered repeated defeats and many military observers believed Japan had gained permanent control of the western Pacific.
Despite these successes, Japan faced a growing strategic problem. The United States possessed far greater industrial resources and was rapidly expanding its navy. Admiral **Isoroku Yamamoto** understood that Japan could not win a prolonged war of production. Instead, he hoped to deliver one overwhelming blow that would destroy the remaining American aircraft carriers and force the United States to negotiate a favourable peace before its industrial strength could be fully brought to bear.
### Why Midway mattered
**Midway Atoll**, located approximately **1,300 miles (2,100 kilometres)** northwest of **Hawaii**, was one of the most important American outposts in the central Pacific. Although consisting of only two small islands surrounded by a coral reef, Midway possessed an airfield, harbour facilities and long-range reconnaissance aircraft capable of monitoring Japanese naval movements across a vast area of ocean.
For the United States, Midway formed an important defensive shield protecting **Pearl Harbor** and the Hawaiian Islands. Losing the atoll would have extended Japan's operational reach much closer to Hawaii and complicated American efforts to launch future offensives across the Pacific. For Japan, capturing Midway would strengthen its expanding defensive perimeter while creating an opportunity to lure the American Pacific Fleet into a decisive naval battle.
Admiral **Yamamoto** believed the United States would have no choice but to defend Midway. By attacking the isolated atoll, he hoped to draw the remaining American aircraft carriers into open waters where they could be surrounded and destroyed by the superior strength of the Combined Fleet. Instead, Midway became the trap into which Japan itself sailed.
### The Doolittle Raid changes everything
On **18 April 1942**, only four months after Pearl Harbor, sixteen **B-25 Mitchell** bombers commanded by Lieutenant Colonel **James H. Doolittle** launched from the aircraft carrier **USS Hornet** and carried out the first American air raid against the Japanese home islands. Although the physical damage inflicted on Tokyo and other cities was limited, the psychological impact was enormous.
The raid shattered the belief that Japan's home islands were beyond the reach of American attack and exposed weaknesses in the nation's defensive perimeter. Japanese military leaders were deeply embarrassed that enemy bombers had reached the capital, while Admiral [**Yamamoto**](https://www.normandy1944.info/home/commanders/life-and-death-of-isoroku-yamamoto) concluded that the remaining American carriers had to be eliminated as quickly as possible before they could support further attacks.
The Doolittle Raid accelerated plans for **Operation MI**, the invasion of Midway. Yamamoto believed that by capturing the atoll and destroying the American carrier fleet in a single decisive engagement, Japan could regain the strategic advantage and secure its expanding Pacific empire.
### Planning Operation MI
Admiral **Isoroku Yamamoto** believed that Japan's greatest remaining threat in the Pacific was the United States Navy's aircraft carriers. Although the attack on **Pearl Harbor** had crippled much of the American battleship fleet, the carriers had not been present in the harbour and remained fully operational. Yamamoto recognised that as long as these carriers survived, they could threaten Japan's expanding empire and eventually challenge its naval supremacy. His solution was **Operation MI**, an ambitious plan to seize **Midway Atoll** and destroy the American carriers in a single decisive battle.
The operation called for Vice Admiral **Chuichi Nagumo's** powerful carrier strike force to launch air attacks against Midway before an invasion force occupied the islands. Yamamoto expected the United States to respond by sending its remaining carriers to defend the atoll. Once they appeared, they would be overwhelmed by the superior strength of the **Combined Fleet**, including battleships, cruisers and destroyers positioned to finish the battle.
The plan, however, was extraordinarily complex. To divert American attention, Japan simultaneously launched an attack against the **Aleutian Islands** in Alaska. This secondary operation scattered Japanese naval forces across thousands of miles of ocean. Yamamoto's battleships and supporting vessels followed far behind Nagumo's carriers, leaving the striking force without immediate support if it encountered unexpected resistance. The success of Operation MI depended upon precise timing, secrecy and the assumption that the Americans remained unaware of Japan's intentions.
### Intelligence wins the first battle
While the Japanese prepared for Operation MI, American intelligence officers in Hawaii were making one of the war's greatest breakthroughs. At **Station HYPO** in Pearl Harbor, Commander **Joseph Rochefort** and his team of cryptanalysts had partially broken the Imperial Japanese Navy's operational code, known as **JN-25**. Although they could not read every intercepted message, they gradually identified enough information to predict that a major offensive against a target designated "**AF**" was imminent.
To confirm that AF referred to Midway, American intelligence officers devised an ingenious deception. The garrison on the atoll transmitted an unencrypted radio message reporting that its water distillation plant had failed. Shortly afterwards, Japanese communications reported that "**AF was short on water**." The message confirmed beyond doubt that Midway was the intended target, allowing Admiral **Chester W. Nimitz** to prepare an ambush instead of reacting to a surprise attack.
The intelligence success fundamentally changed the coming battle. Rather than searching the vast Pacific for the Japanese fleet, the United States Navy knew approximately where and when the enemy would appear. Midway became one of history's greatest examples of intelligence shaping the outcome of a major military operation before the first shot had even been fired.
### Preparing the ambush
Armed with Rochefort's intelligence, Admiral **Nimitz** committed every available carrier to defend Midway. The task was far from straightforward. Vice Admiral **William F. Halsey**, commander of **USS Enterprise** and **USS Hornet**, was hospitalised with a severe skin condition shortly before the operation. Command of his task force therefore passed to Rear Admiral **Raymond A. Spruance**, an experienced cruiser commander who had little practical experience leading carrier operations.
Meanwhile, **USS Yorktown** appeared unlikely to take part at all. During the **Battle of the Coral Sea** in May 1942, the carrier had suffered extensive bomb and torpedo damage that was expected to require several months of repairs. After inspecting the ship at **Pearl Harbor**, however, engineers concluded that enough emergency work could be completed in just seventy-two hours to return Yorktown to combat. Working around the clock, thousands of shipyard workers repaired boilers, restored essential systems and reinforced damaged sections of the flight deck.
The remarkable effort ensured that the United States entered the battle with three fleet carriers: **Enterprise**, **Hornet** and **Yorktown**. Although still outnumbered by Japan's four frontline carriers, Nimitz now possessed the force required to challenge Yamamoto's offensive. Hidden northeast of Midway, the American carriers waited in silence for the Japanese fleet to enter the trap that intelligence had helped create.
### The opposing fleets
The Japanese attack was spearheaded by Vice Admiral **Chuichi Nagumo's** **First Air Fleet**, the most powerful carrier striking force in the world. It consisted of the fleet carriers **Akagi**, **Kaga**, **Soryu** and **Hiryu**, supported by battleships, heavy cruisers, destroyers and submarines. Together, these carriers embarked more than **240 aircraft**, including the highly respected **Mitsubishi A6M Zero** fighter, the **Aichi D3A "Val"** dive bomber and the **Nakajima B5N "Kate"** torpedo bomber.
Facing them were three American fleet carriers under the overall command of Admiral **Nimitz**. Rear Admiral **Frank Jack Fletcher** commanded **Yorktown**, while Rear Admiral **Raymond Spruance** led **Enterprise** and **Hornet**. Their air groups flew **Douglas SBD Dauntless** dive bombers, **Douglas TBD Devastator** torpedo bombers and **Grumman F4F Wildcat** fighters. Midway itself also contributed Marine Corps fighters, Navy aircraft and long-range Army bombers operating from the island's airfield.
On paper, Japan retained the advantage in experience, training and carrier strength. Yet the Americans possessed one decisive advantage that could not be measured in numbers: they already knew where the Japanese fleet was heading. As both forces steamed toward Midway in early June 1942, each believed it was about to surprise the other. Only one of them was correct.
Adversaries in this battle
### United States Navy
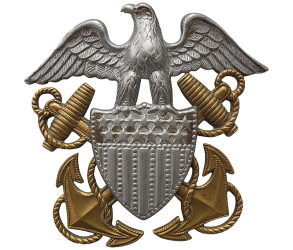The United States Navy defended Midway Atoll with three aircraft carriers, supported by cruisers, destroyers and land-based aircraft.
### Imperial Japanese Navy
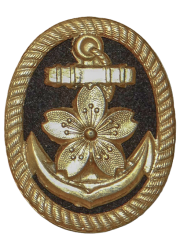The Imperial Japanese Navy launched Operation MI with four fleet carriers and the largest carrier strike force assembled by Japan during the war.
### Battle specifications
### Date of the battle
3 June 1942
---
### Duration of the battle
6 June 1942
---
### Reason for the battle
Destroy the remaining American aircraft carriers and capture Midway Atoll to strengthen Japan's defensive perimeter.
---
### Location
Midway Atoll, Central Pacific Ocean
---
### Battle result
Decisive American victory
---
[### Battle of Midway Location Map
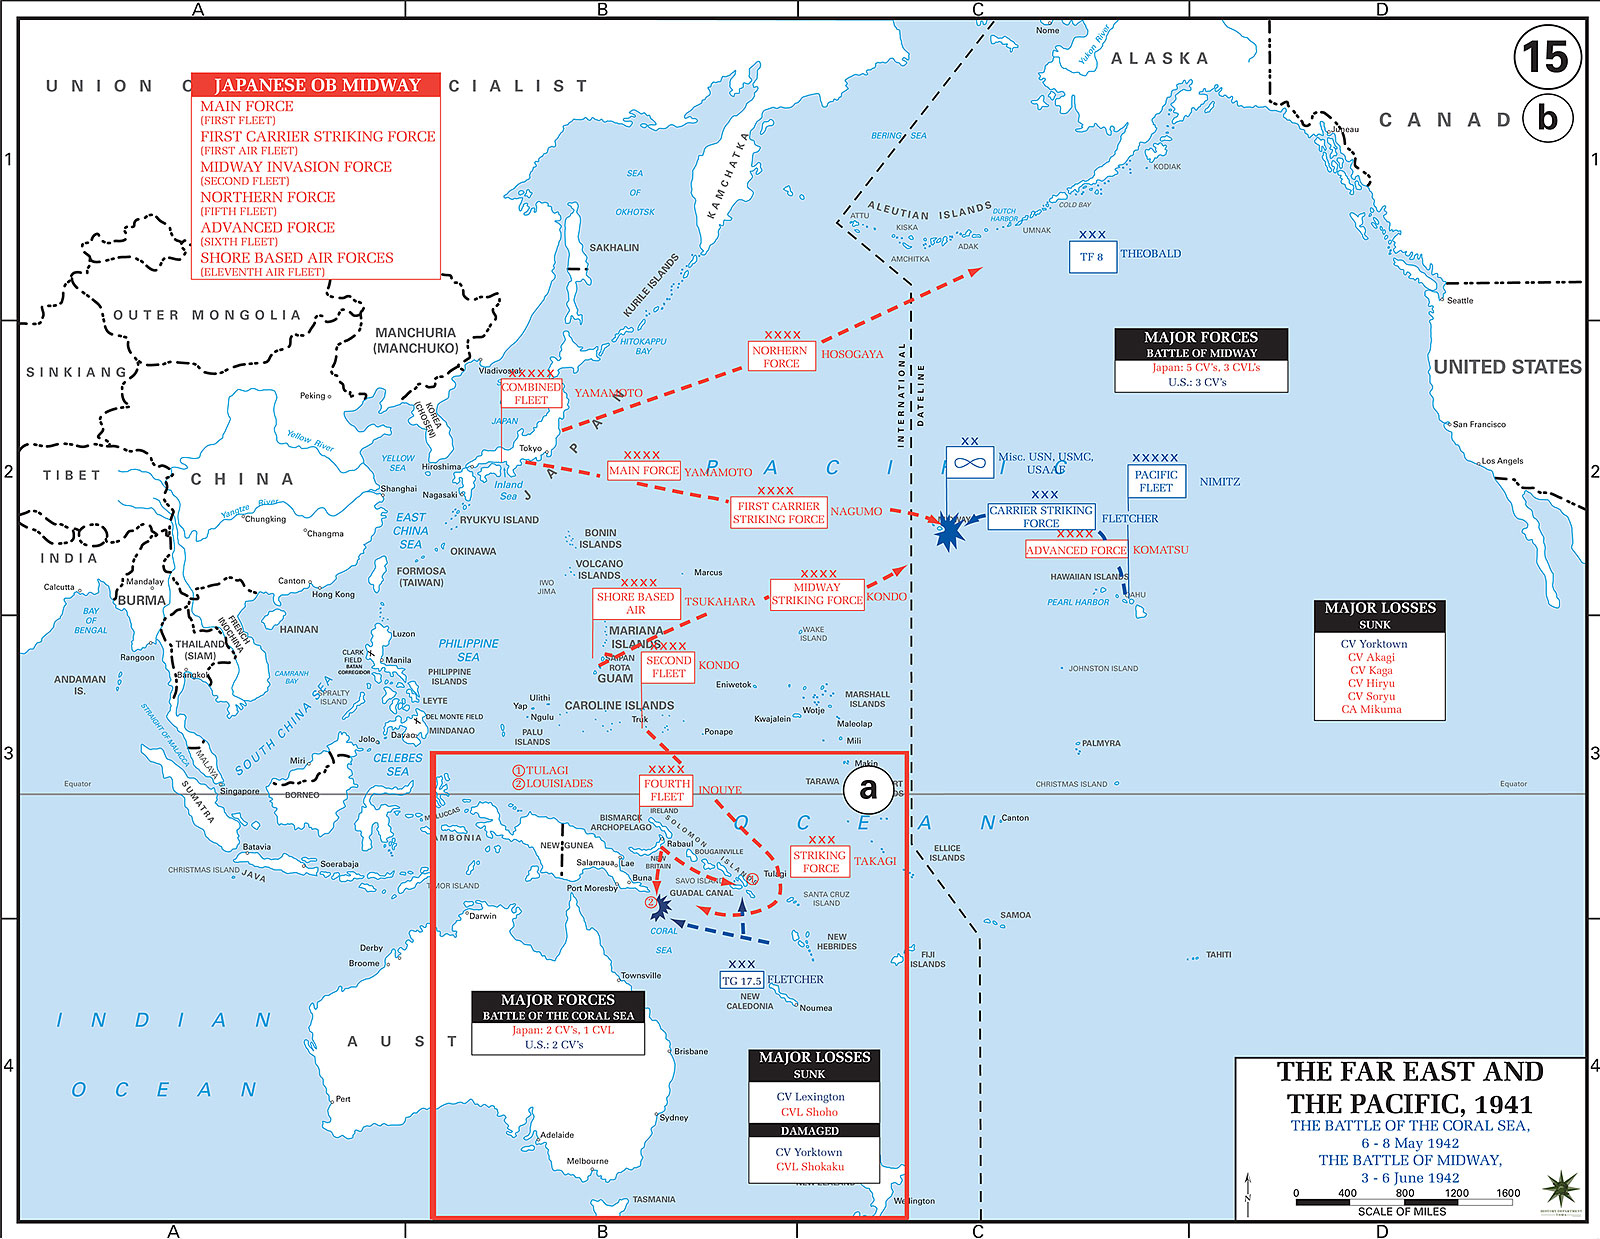Map of the Battle of Midway
](https://www.normandy1944.info/images/battles/midway/Battle-of-Midway-battle-map-3-june-1942.jpg)
---
### Allied casualties
- Killed: 307
- Wounded: 300 (estimated)
- Planes lost: 150
- Equiment lost:
1 fleet carrier, 1 destroyer
---
### Axis casualties
- Killed: 3,057
- Wounded: Unknown
- Planes lost: 248
- Equipment lost:
4 fleet carriers, 1 heavy cruiser
---
Page updated on: 23 July 2026
Military awards associated with this campaign
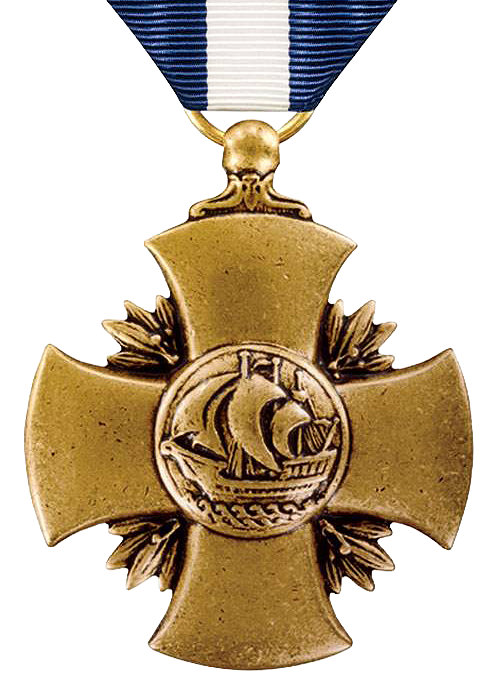### US Navy Cross
Awarded for extraordinary heroism in combat at sea.
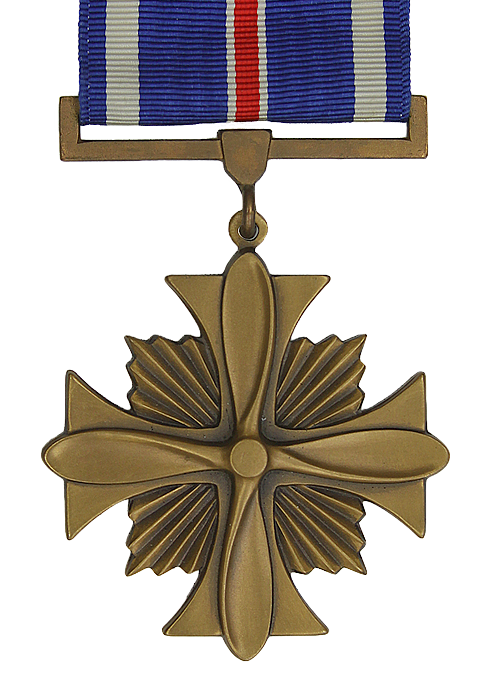### Distinguished Flying Cross
Awarded to pilots and aircrew for heroism or extraordinary achievement during aerial combat missions.
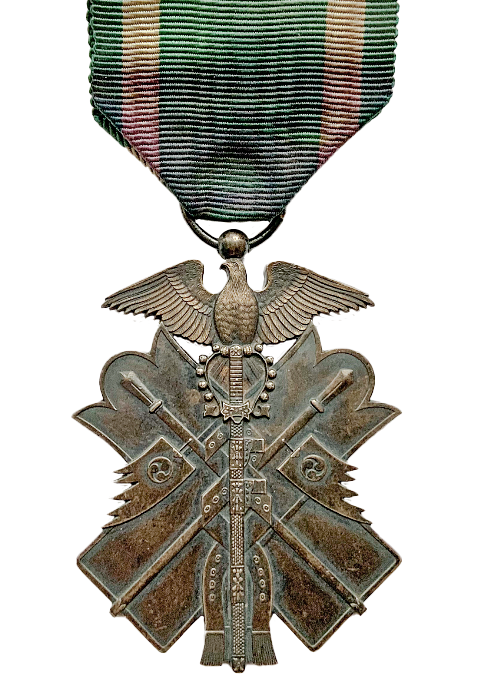### Order Of The Golden Kite
Japan's highest military decoration for bravery and leadership in combat.
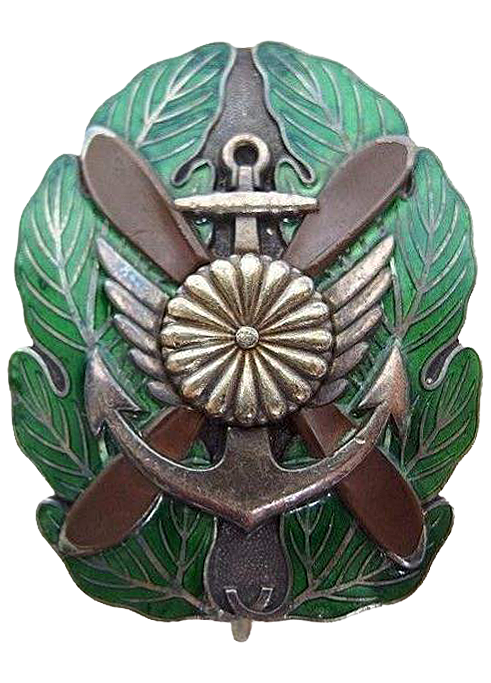### Imperial Japanese Naval Aviator Badge
Awarded to qualified pilots of the Imperial Japanese Navy.
[](#)
[](#)
Some original WW2 formation patches and medals shown here are from my own personal collection.
Footage of this battle
Video courtesy of: History Channel
Video courtesy of: Smithsonian Channel
### The opening attack
Before dawn on **4 June 1942**, Vice Admiral **Chuichi Nagumo** launched the first phase of Japan's assault on Midway. At approximately **04:30**, his four fleet carriers: **Akagi**, **Kaga**, **Soryu** and **Hiryu** sent **108 aircraft** toward the atoll. Their mission was to destroy Midway's airfield, neutralise its defences and prepare the way for an amphibious invasion.
As Japanese bombers approached the island shortly after sunrise, American radar detected the incoming formation and fighters scrambled to intercept. Marine Corps pilots flying obsolete **F2A Brewster Buffalo** and **F4F Wildcat** fighters fought with determination but suffered heavy losses against the more experienced Japanese aviators. Bombs struck runways, fuel storage facilities and military installations, yet Midway's defenders continued to resist. Anti-aircraft batteries remained active and several American aircraft managed to take off despite the bombardment.
Following the attack, the strike leader radioed Nagumo that Midway had not been fully neutralised and recommended a second attack before landing troops. It appeared to confirm Japanese expectations that the operation was progressing according to plan. Unknown to Nagumo, however, American aircraft carriers were already closing in from the northeast.
### Nagumo's dilemma
While the first wave returned from Midway, Nagumo faced one of the most difficult command decisions of the Pacific War. Following Japanese naval doctrine, he had kept roughly half of his carrier aircraft in reserve, armed with torpedoes in case enemy warships were encountered. Since no American fleet had yet been reported, he ordered these reserve aircraft to be brought into the hangars and rearmed with high-explosive bombs for a second strike against Midway.
As mechanics and armourers worked frantically below deck, reports began arriving that complicated the situation. American aircraft launched from Midway attacked the Japanese fleet in several uncoordinated waves. Although none scored direct hits, they forced Nagumo's carriers to manoeuvre repeatedly, delaying flight operations and preventing the orderly launch of a second strike.
Then came the message Nagumo had feared. A delayed reconnaissance aircraft reported sighting a force of American warships east of the Japanese fleet. Moments later, the report was updated to confirm the presence of at least one aircraft carrier. Nagumo now faced an impossible choice. Should he launch his partially armed aircraft immediately, or recover the returning Midway strike, complete the rearming process and assemble a properly coordinated attack? Choosing the latter, he ordered the returning aircraft to land first. The decision, although understandable under the circumstances, left his carriers dangerously vulnerable at precisely the wrong moment.
### American attacks from Midway
Even before the American carriers launched their aircraft, Midway's defenders mounted a determined series of attacks against the approaching Japanese fleet. Army Air Forces **B-17 Flying Fortress** bombers attempted high-altitude bombing runs, while Marine Corps dive bombers, torpedo aircraft and Navy patrol planes attacked from different directions throughout the morning.
The attacks achieved little direct success. High-altitude bombing proved inaccurate against manoeuvring warships, while low-flying aircraft faced devastating anti-aircraft fire and relentless attacks by Japanese **Zero** fighters. Several American aircraft were shot down before reaching their targets and none managed to score a decisive hit.
Despite these failures, the attacks had an important tactical effect. Nagumo was forced to keep changing course to avoid incoming aircraft, delaying the recovery of his returning strike force and disrupting preparations for launching another attack. Every passing minute increased the vulnerability of his carriers while American carrier aircraft continued to close the distance.
### The sacrifice of the torpedo squadrons
Having located the Japanese fleet, the American carriers launched their own aircraft at extreme range. Due to navigation difficulties and poor coordination, the various squadrons became separated and reached the enemy independently rather than in a single, overwhelming attack.
The first to arrive were the slow **Douglas TBD Devastator** torpedo bombers from **Torpedo Squadron 8 (VT-8)** aboard **USS Hornet**, followed by aircraft from **Enterprise** and **Yorktown**. Flying without adequate fighter protection, they pressed home their attacks at low altitude against overwhelming opposition. Japanese **Zero** fighters and concentrated anti-aircraft fire tore through the formations. One after another, the torpedo bombers were shot down before they could score a single hit.
The losses were devastating. Of the thirty airmen who took part in **VT-8's** attack, only Ensign **George Gay** survived. Similar losses were suffered by the other torpedo squadrons, making the attacks among the costliest missions flown by the United States Navy during the war. Yet their sacrifice proved decisive. The relentless low-level assaults drew the Japanese fighter patrols down to sea level, exhausted pilots and disrupted Nagumo's ability to launch his own aircraft, leaving the skies above the carriers almost unprotected.
### Six Minutes That Changed the Pacific War
At approximately **10:22 a.m.**, American **SBD Dauntless** dive bombers from **Enterprise** and **Yorktown** finally arrived over the Japanese fleet. Guided in part by the wake of the destroyer **Arashi**, which had been pursuing an American submarine, the dive bombers unexpectedly found themselves directly above Nagumo's carriers at the most vulnerable moment imaginable.
Below them, the Japanese hangar decks were crowded with aircraft being refuelled and rearmed. Aviation fuel lines, bombs and torpedoes lay exposed as crews hurried to prepare the next strike. Diving almost unopposed from high altitude, the American pilots attacked with devastating accuracy.
Within just six minutes, three of Japan's frontline carriers were mortally wounded. Bombs slammed into **Kaga**, triggering massive explosions and uncontrollable fires. A single bomb struck the flagship **Akagi** near the centre elevator, igniting armed aircraft inside the hangar deck and sealing the ship's fate. Meanwhile, **Soryu** was hit repeatedly, setting off explosions that rapidly engulfed the carrier in flames.
The heart of Japan's elite carrier force had been destroyed in a matter of minutes. The battle that Yamamoto had hoped would eliminate the American carriers had instead become one of the greatest disasters in the history of the Imperial Japanese Navy.
### Hiryu strikes back
Although three of Japan's fleet carriers had been fatally damaged, the battle was not yet over. The fourth carrier, **Hiryu**, had escaped the initial American attack and immediately launched a counterstrike against the United States fleet. Guided by reconnaissance aircraft, Japanese dive bombers located **USS Yorktown**, which they correctly identified as an American carrier operating east of Midway.
The first wave attacked shortly before noon. Despite intense anti-aircraft fire and determined fighter opposition, several bombs struck **Yorktown**, damaging her flight deck and knocking out her boilers. For a time the carrier came to a halt, but exceptionally efficient American damage control crews extinguished the fires, restored power and returned the ship to operational status within little more than an hour. Japanese pilots later reported sinking the carrier, unaware that it had resumed operations.
Believing they had discovered a second American carrier, **Hiryu** launched another strike during the afternoon. In reality, the target was the same **Yorktown**, now back underway. This time, two torpedoes slammed into the carrier's port side, causing severe flooding and a heavy list. With power lost and the ship beyond immediate recovery, Captain **Elliott Buckmaster** reluctantly ordered the crew to abandon ship.
### The destruction of Hiryu
While Japanese aircraft attacked **Yorktown**, American scout planes searched relentlessly for the remaining enemy carrier. During the afternoon, **Hiryu** was finally located and aircraft from **USS Enterprise** were launched to eliminate Japan's last offensive striking force.
The American dive bombers found **Hiryu** as her crew prepared another strike. Plunging through light anti-aircraft fire, they scored several direct hits that ignited aircraft, fuel and ammunition across the flight deck. Fires quickly spread through the carrier, making organised firefighting impossible. By evening, **Hiryu** had been reduced to a burning wreck.
With all four of his frontline fleet carriers either sinking or beyond saving, Admiral **Yamamoto** recognised that the battle had been lost. Plans to invade Midway were abandoned and the Japanese fleet began withdrawing westward. During the following day, **Hiryu** was abandoned by her crew before being scuttled by accompanying destroyers.
### The loss of USS Yorktown
Although the battle had ended in an American victory, **USS Yorktown** had not yet been lost. Salvage parties returned to the damaged carrier and succeeded in stabilising the ship. Accompanied by the destroyer **USS Hammann**, Yorktown was taken under tow and slowly began the journey back toward **Pearl Harbor**. There remained genuine hope that the veteran carrier could once again be repaired.
On **6 June 1942**, however, the Japanese submarine **I-168** penetrated the protective screen surrounding the damaged carrier. Firing a spread of torpedoes, the submarine struck both **Yorktown** and **Hammann**. The destroyer sank within minutes, while additional flooding left the carrier beyond saving.
Despite determined salvage efforts, **USS Yorktown** finally capsized and sank on the morning of **7 June 1942**. Her loss was a painful reminder that even overwhelming victories carried a heavy price. Yet Yorktown's aircraft and crew had already played a decisive role in destroying the Japanese carrier force and securing one of the most important victories in American naval history.
### Related insignias
[ 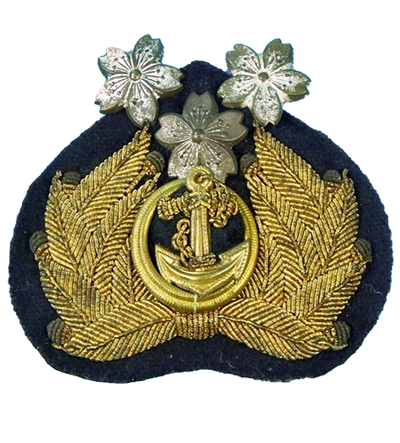 Japanese Navy officer's cap badge
Original WW2 item
](https://www.normandy1944.info/images/patches/Imperial-Japanese-Navy.png)
[ 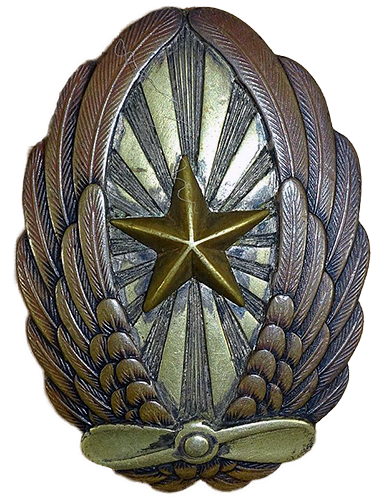 Japanese Navy Pilot Badge
Original WW2 item
](https://www.normandy1944.info/images/patches/Japanase-navy-pilot-NCO-badge.png)
[ 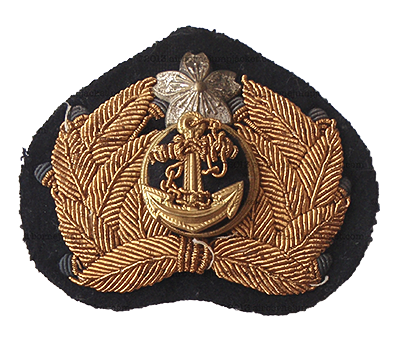 Standard Imperial Japanese Navy officer's cap badge
Original WW2 item
](https://www.normandy1944.info/images/patches/Japanase-navy-cap-badge.png)
[ 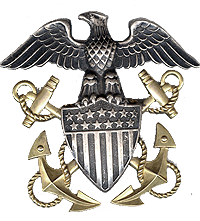 US Navy Badge
Original WW2 item
](https://www.normandy1944.info/images/patches/us-navy-badge.png)
[ 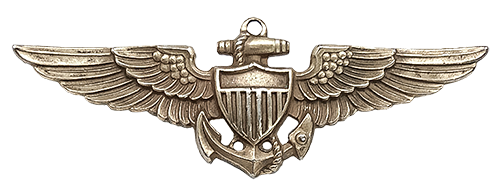 US Navy Pilot Badge
Original WW2 item
](https://www.normandy1944.info/images/patches/US-navy-pilot-badge.png)
[ 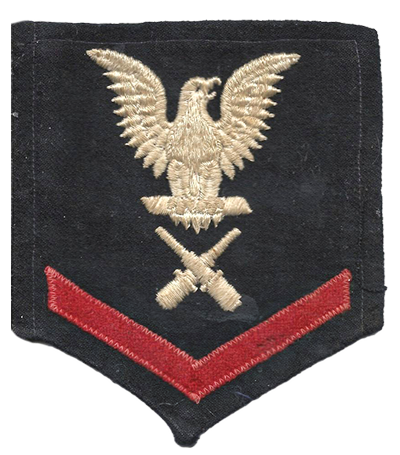 US Gunners mate patch
Original WW2 item
](https://www.normandy1944.info/images/patches/US-Gunners-Mate-3rd-Class.png)
Some of these original WW2 badges and insgnias from my own personal collectioin.
#### Photographs of Battle of Midway
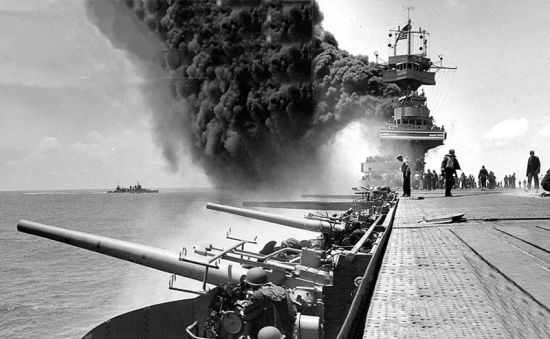USS Yorktown comes under attack by Japanese aircraft during the Battle of Midway on 4 June 1942.
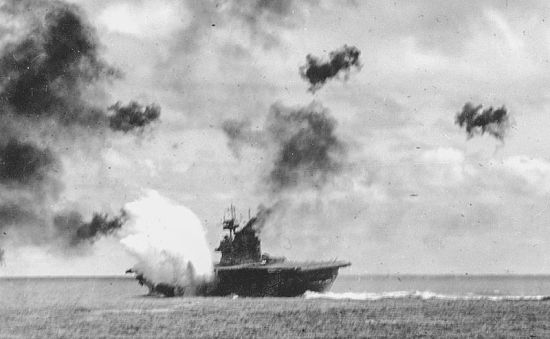A Japanese bomb explodes alongside USS Yorktown during the Battle of Midway.
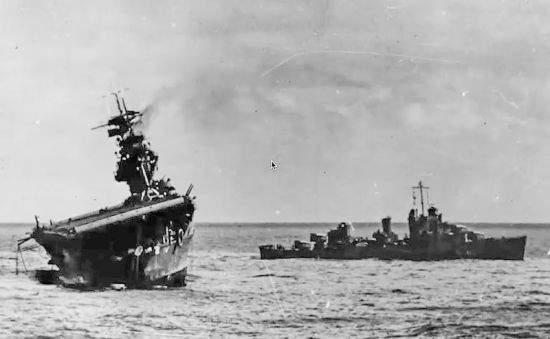The abandoned USS Yorktown lists heavily after suffering bomb and torpedo damage during the Battle of Midway. She eventually sank on 7 June 1942.
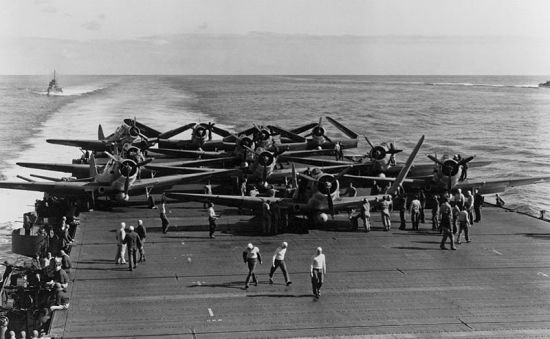Aircraft are prepared for launch aboard USS Hornet as the United States Navy prepares for the Battle of Midway in June 1942.
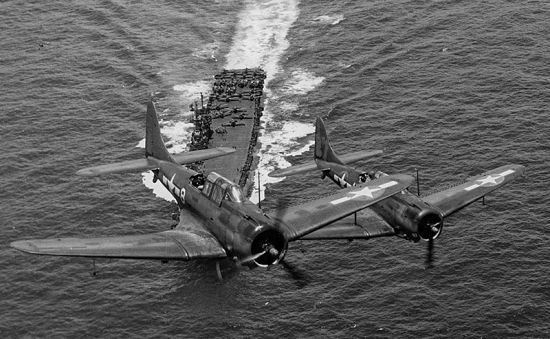Douglas SBD Dauntless dive bombers fly over an American aircraft carrier during the Battle of Midway. The SBD played a decisive role in destroying four Japanese fleet carriers
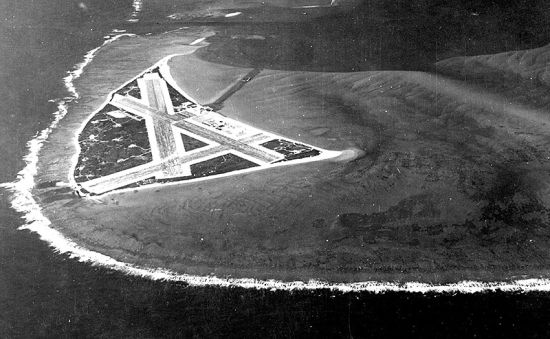An aerial view of Midway Atoll showing its airfield before the Battle of Midway. The island's strategic location made it a key objective in Japan's attempt to eliminate American carrier forces.
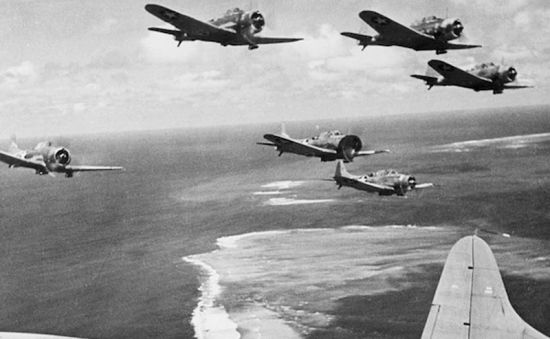Imperial Japanese Navy aircraft fly over Midway Atoll during the opening attacks on 4 June 1942, beginning one of the most decisive naval battles of the Second World War.
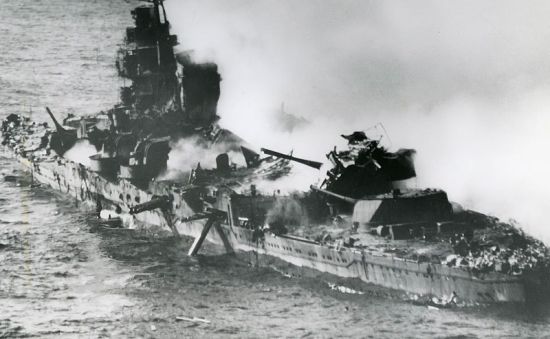The heavy cruiser Mikuma burns after repeated attacks by American carrier aircraft on 6 June 1942. She became one of Japan's major naval losses following the Battle of Midway.
[](#)
[](#)
### Casualties and losses
The **Battle of Midway** ended in a decisive American victory and inflicted devastating losses on the Imperial Japanese Navy. Japan lost its four frontline fleet carriers, **Akagi**, **Kaga**, **Soryu** and **Hiryu**, together with the heavy cruiser **Mikuma**. More than **3,000 Japanese sailors and airmen** were killed, while approximately **250 aircraft** were destroyed during the battle.
The United States also paid a significant price. The carrier **USS Yorktown** and the destroyer **USS Hammann** were lost, along with around **150 aircraft**. American casualties totalled just over **300 personnel**. Although painful, these losses were far smaller than those suffered by Japan and could be replaced far more rapidly by the growing American industrial base.
### Why Japan could not recover
The destruction of four fleet carriers was a severe blow, but the greatest loss was one that could not easily be measured. Hundreds of experienced naval aviators, flight deck officers and maintenance specialists were killed during the battle. These men represented years of specialised training and combat experience gained in China, Pearl Harbor and the opening campaigns of the Pacific War.
Unlike the United States, Japan lacked the industrial capacity and training infrastructure to replace these losses quickly. New aircraft and ships could eventually be built, but experienced carrier aircrews required years to train. As the war continued, the quality of Japanese naval aviation steadily declined, while American production and pilot training expanded on an unprecedented scale.
### Why Midway was the turning point in the Pacific
Before Midway, Japan held the strategic initiative across the Pacific. After Midway, that advantage passed permanently to the United States. Although fierce fighting continued for another three years, Japan was forced increasingly onto the defensive while American industry produced new carriers, aircraft and trained personnel at a rate that Japan could not match.
The battle also confirmed the decisive importance of aircraft carriers in modern naval warfare. Battleships, once regarded as the dominant weapons of the sea, played almost no direct role in the outcome. Instead, aircraft launched from carriers determined the course of the battle long before opposing surface fleets came within gun range.
### The road to Guadalcanal
Only two months after Midway, the United States launched its first major offensive of the Pacific War by landing Marines on **Guadalcanal** in the **Solomon Islands**. The campaign marked the beginning of a long Allied advance across the Pacific through a strategy of amphibious assaults and island hopping.
Although many difficult battles still lay ahead, including the **Philippine Sea**, **Leyte Gulf**, **Iwo Jima** and **Okinawa**, Japan never again regained the strategic initiative it had lost at Midway. The victory provided the momentum that allowed the Allies to carry the war steadily toward the Japanese home islands.
### Conclusion
The **Battle of Midway** demonstrated that intelligence, preparation and decisive leadership could overcome numerical superiority. American codebreakers, naval commanders and aircrews combined to inflict a defeat from which the Imperial Japanese Navy never fully recovered. In the space of a single day, Japan lost the core of the carrier force that had carried it from victory to victory across the Pacific.
Today, Midway is remembered as one of the defining turning points of the **Second World War**. It ended Japan's period of rapid expansion, shifted the strategic initiative to the United States and transformed the Pacific War into a relentless Allied advance. More than eighty years later, the battle remains one of history's greatest examples of how intelligence, courage and a few decisive moments can alter the course of a global conflict.
Famous WW2 quotes
Preparing for battle
"In preparing for battle I have always found that plans are useless, but planning is indispensable.ed only kick in the door, and the whole rotten structure will come crashing down".
General Dwight D. Eisenhower
The fewest mistakes
"Victory belongs to the side that makes the fewest mistakes'.
Admiral Isoroku Yamamoto
---
[ Get in touch with me ](https://www.normandy1944.info/contact#contact)
### More epic battles of the Second Wold War
[ 
### Battle of Midway
3 June 1942
What was the Battle of Midway? The Battle of Midway, fought between 4 and 7 June 1942, was one of the most decisive naval battles of the Second Worl…
Discover this battle
](https://www.normandy1944.info/home/battles/battle-of-midway)
[ 
### Operation Barbarossa
22 June 1941
What was Operation Barbarossa? Operation Barbarossa was the codename for Nazi Germany's invasion of the Soviet Union, launched on 22 June 1941 durin…
Discover this battle
](https://www.normandy1944.info/home/battles/operation-barbarossa)
[ 
### Battle of Normandy
6 June 1944
What is the Battle of Normandy? The Battle of Normandy (6 June – 25 August 1944) was the decisive Allied campaign to liberate France from German occ…
Discover this battle
](https://www.normandy1944.info/home/battles/battle-of-normandy)
[ 
### Battle of Texel
5 April 1945
What Was the Battle for Texel? The Battle of Texel, also known as the Georgian Revolt on Texel, was one of the final battles fought in Europe during…
Discover this battle
](https://www.normandy1944.info/home/battles/battle-of-texel)
[ 
### Battle of Iwo Jima
19 February 1945
What was the Battle of Iwo Jima? The Battle of Iwo Jima (19 February - 26 March 1945), codenamed Operation Detachment, was one of the bloodiest batt…
Discover this battle
](https://www.normandy1944.info/home/battles/battle-of-iwo-jima)
[ 
### Battle of Stalingrad
17 July 1942
What was the Battle of Stalingrad? The Battle of Stalingrad (17 July 1942 - 2 February 1943) was one of the most decisive and bloodiest battles of t…
Discover this battle
](https://www.normandy1944.info/home/battles/battle-of-stalingrad)
[ 
### Battle of Kursk
5 July 1943
The Battle of Kursk or Operation Citadel was a large and decisive tank battle on the Eastern Front in World War II. It marked the end of the German o…
Discover this battle
](https://www.normandy1944.info/home/battles/battle-of-kursk)
[ 
### Battle of Berlin
16 April 1945
What was the Battle for Berlin? The Battle for Berlin was the final major battle in Europe during the Second World War. It took place from 16 April…
Discover this battle
](https://www.normandy1944.info/home/battles/battle-of-berlin)
[ 
### Battle of the Ardennes
16 december 1944
The Battle of the Bulge, also known as the Battle of the Bulge, was the last major offensive by the German Wehrmacht on the Western Front in World Wa…
Discover this battle
](https://www.normandy1944.info/home/battles/battle-of-the-ardennes)
[ 
### Attack on Pearl Harbor
7 December 1941
What was the Attack on Pearl Harbor? The Attack on Pearl Harbor took place on the morning of 7 December 1941, when the Imperial Japanese Navy launch…
Discover this battle
](https://www.normandy1944.info/home/battles/attack-on-pearl-harbor)
[](#)
[](#)
#### Cite this historical page
I aim to provide open-access accurate historical records. If you are using this content for academic research, articles or educational projects, please use the citation below to credit this source. Click the button below to copy the direct URL for your research or citations.
###### Share this page on social media
The stories on my website are meant to educate people about WW2. You can help by sharing them with your family and friends on your social platforms. Thank you so much for your assistance.
- [](https://x.com/intent/post?url=https%3A%2F%2Fwww.normandy1944.info%2Fhome%2Fbattles%2Fbattle-of-midway.md&text=)
- [](https://www.facebook.com/sharer/sharer.php?u=https%3A%2F%2Fwww.normandy1944.info%2Fhome%2Fbattles%2Fbattle-of-midway.md)
- [](http://pinterest.com/pin/create/button/?url=https%3A%2F%2Fwww.normandy1944.info%2Fhome%2Fbattles%2Fbattle-of-midway.md)
- [](https://api.whatsapp.com/send?text=https%3A%2F%2Fwww.normandy1944.info%2Fhome%2Fbattles%2Fbattle-of-midway.md)
## Schema
```json
{ "@context": "https://schema.org", "@type": "Article", "mainEntityOfPage": { "@type": "WebPage", "@id": "https://www.normandy1944.info/home/battles/battle-of-midway" }, "headline": "Battle of Midway", "description": "Explore the Battle of Midway, fought from 3 to 6 June 1942. Learn how US code breakers, carrier aviation and decisive leadership destroyed four Japanese carriers and turned the tide of the Pacific War.", "image": { "@type": "ImageObject", "url": "https://www.normandy1944.info/images/battles/midway/Battle-of-Midway-June-3-1942.jpg" }, "publisher": { "@type": "Organization", "name": "Normandy1944.info – D-Day, Normandy and Beyond", "logo": { "@type": "ImageObject", "url": "https://www.normandy1944.info/images/logo/D-Day-Normandy-1944-WW2-logo.png" } }, "author": { "@type": "Person", "name": "Frank C. Everards", "url": "https://www.normandy1944.info/blog/how-it-started" }, "datePublished": "2026-07-23T08:58:23+02:00", "dateCreated": "2026-07-23T07:58:23+02:00", "dateModified": "2026-07-23T13:13:55+02:00" }
```